Building a Backward Rainscreen

The precast system overlays frame and shear walls, and is an integral part of the shading system of the building. The layering of the structure, window, and rainscreen systems creates visual depth in the façade that varies throughout the day as lighting conditions change.
© Tim Griffith
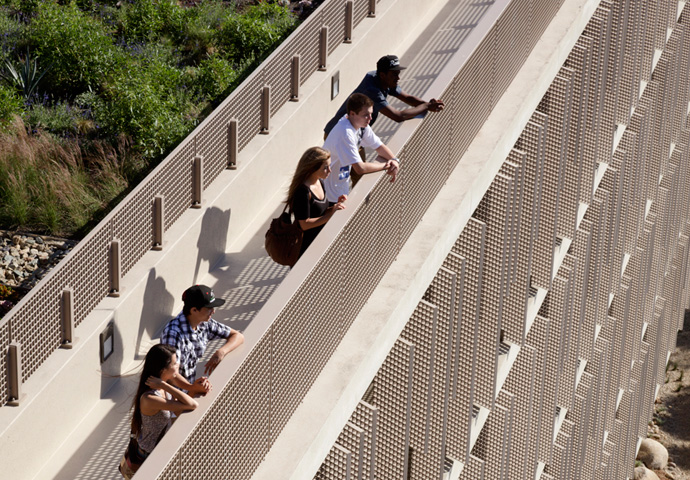
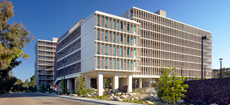
At Keeling Apartments, a residence hall on the University of California, San Diego campus, the exterior and interior walls, floors and ceilings are exposed concrete, constructed with intense focus on composition, formwork, and craft. The exterior is clad with precast concrete panels hung in front of the structure as rainscreens, supplemented by cement board cladding and window infill at the open bays of the concrete frame. Given their large size, the precast panels must be anchored to the building frame from the interior, before the weatherproofed back-up wall behind is installed.
This construction is known as a “backward” rainscreen wall because the assembly must be constructed from the outside in, resolving details of flashing and air/weather barrier continuity in the opposite sequence of construction from conventional curtainwall assemblies, in which exterior cladding is installed after the back-up wall construction is in place.
This backward rainscreen wall represented a building envelope assembly that was new and unusual for KieranTimberlake; our project goals included advancing our understanding of energy efficient buildings and integrating our research and design teams to achieve technical excellence in its construction.
Our design development phase requires use of in-office prototyping to investigate new components or assemblies and establish requirements for subsequent construction phase mock-up and testing. We defined a prototyping plan to test the concept of constructing the back-up wall and weather barrier at our precast rainscreen from the outside in. This prototype simulated the form and process of the back-up wall installation after large precast panels are secured to the building structure.
The construction sequence started with attachment of the precast panels, followed by construction of a flashed aluminum tube and angle frame set back to avoid the precast anchor clips, then tilt-up installation of the back-up wall to but against and seal to the perimeter frame, followed by insulation, secondary air seal and interior finish.
Goals for the mock-up included:
- Confirming the weight, stability, and maneuverability for installation of the back-up wall.
- Confirming attachment of the deflection track at the top of the back-up to the ceiling slab once the tilt-up wall is in place.
- Confirming the blind-side weather seal condition at the perimeter of the back-up wall.
- Testing the appearance of closure trim at window openings.
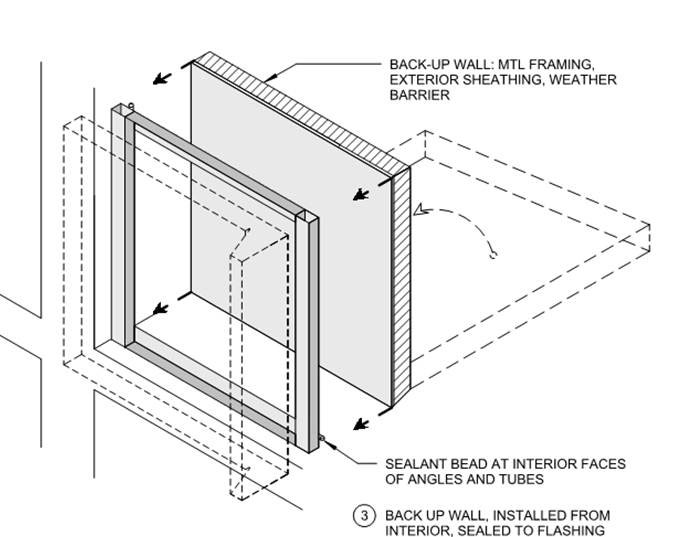
A diagram shows the concept of constructing the back-up wall and weather barrier from the outside in.
Our design phase prototyping exercises helped us establish the scope for the on-site, contractor-built wall assembly mock-ups. Working with the various trades involved, we identified critical installation and performance issues, especially at seams between the work of different trades. We were also able to determine several no-cost refinements at this stage that improved quality and performance of the wall installation.
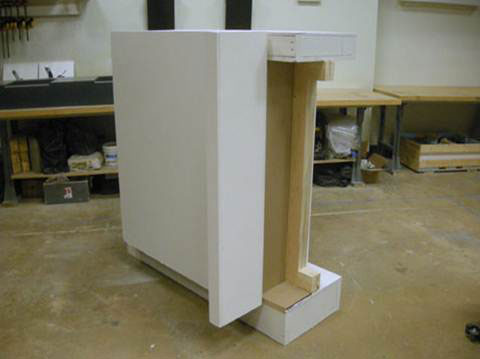
This prototype simulated the back-up wall installation after large precast panels are secured to the building structure.
Testing of the mock-ups was followed by ASTM in-situ testing of selected installed windows and extensive hose-stream tests of installed back-up panels. Working with the general contractor, installers and the envelope commissioning inspector, we established a tiered quality control process that included checklist inspection
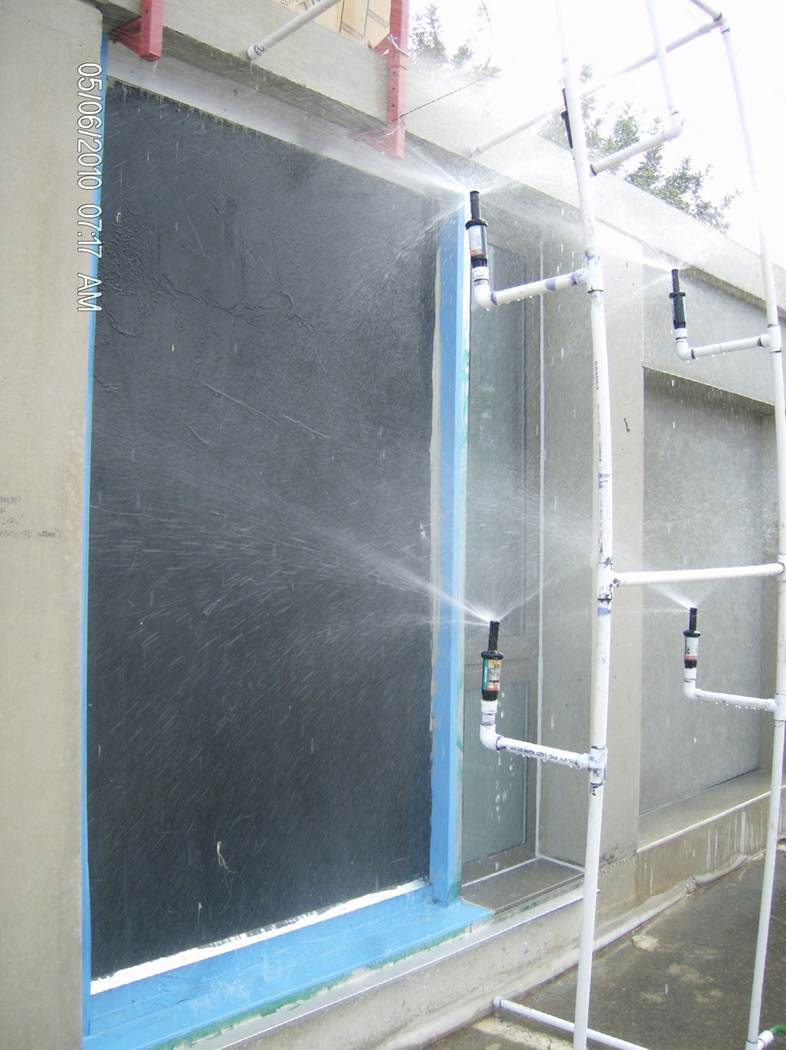
Extensive hose-stream testing was conducted on the mock-ups.
Once the construction sequence was confirmed by the approved mock-up, a process was set up to mass-produce the back-up wall panels and prepare the perimeter frames and flashing. The contractor maintained the installation schedule in spite of some winter weather-related delays. We sequenced our final punch list inspection for the exterior walls to stay ahead of removal of the wall scaffolding.
In the two years since completion of construction, the project is performing well, having weathered several severe winter storms without water penetration or air infiltration.